Please select your SAP® base release to display the correct paths and file names.
Paths and file names depending on the SAP® base release used:
For the SmartExporter SAP® components version 7.0.0000 or higher the Add-On and the transport will be shipped in two different versions for the SAP® base release 700 and higher: one version for SAP® base releases 700 to 731 (in the subfolder 700 on the SAP® components CD) and one version for SAP® base release 740 or higher (in the subfolder 740). The reason for this is that the implementation of the storage locations for SAP® base releases lower than version 740 are not supported for Azure services.
To not impair the readability of the help topics, all topics with version specific paths or file names contain a drop-down list at the start of the topic. After switching to your SAP® base release in this drop-down list, all paths and file names will be shown in the correct form throughout the topic.
Do you need any help checking your SAP® base release?
Installation of support packages
Support packages can be installed using the SPAM (Support Package Manager) transaction.
Please open the Support Package menu and select the Load Packages entry and then From Front End. If you are using a more recent version of the Add-On Installation Tool, select SAR archives from Front End.
Alternatively, move the PAT files located in the PATCHES folder to your transport directory’s EPS Inbox. Please open the Support Package menu and select the Load Packages entry and then From Application Server. If you are using a more recent version of the Add-On Installation Tool, select EPS files from application server.
In more recent versions of the Add-On Installation Tool, as an alternative, you can also copy the SAR files to the directory EPS\download (or EPS/download respectively) of your transport directory. In this case open the Support Package menu, select the Load Packages entry and then SAR archives from application server.
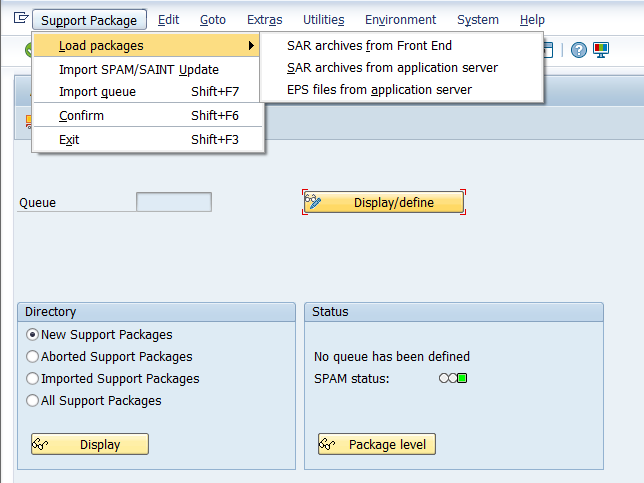
Figure: Support Package Manager

Figure: Content of the compressed file
The warning “The archive is not signed!” can be ignored because only archives that were created by SAP® can be signed.
You can determine the SHA-1 hash values of the corresponding files and compare them with the information in the checksums.txt file. Please note that this link always leads to the SHA-1 hash values of the latest Add-On. If the linked SHA-1 hash values do not match your checksums, please contact the Audicon Support.
Click the Decompress button.
The archive will be loaded, decompressed, moved to the EPS Inbox and deleted.
Click the Display/define button to start the installation process.

Figure: Component Selection
Select the AUDIC component and click the  button.

Figure: Define queue
Select the highest support package and click the button.
As no modification adjustment transports are necessary in the context of the installation click "No" in the following confirmation prompt.
![]()
Figure: Modification Adjustment
Click ![]() to start the import of the queue.
to start the import of the queue.
Due to the small data volume of the support package the installation may be run in dialog mode.
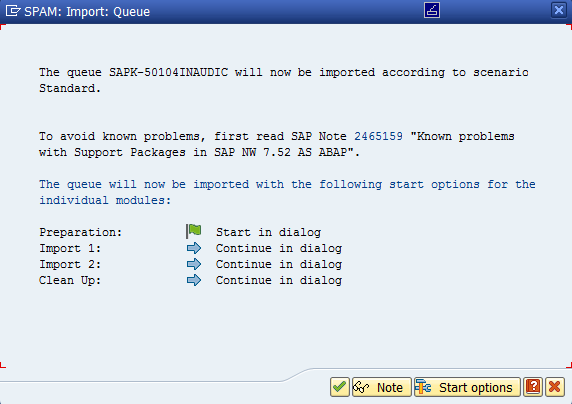
Figure: SPAM Import
Click to start the import.
The support packages are installed in dialog mode. The current status will be shown in the status bar.

Figure: Import queue
After the installation is complete an information message will notify you that the installation was completed successfully. Click the button.

Figure: Import finished
Finally, you have to confirm the queue to complete the installation. Click the Confirm queue  button.
Depending on the SAP® basis and SPAM/SAINT version the Sending the runtime analysis dialog will be displayed. Read the description of the available options and select the desired option by clicking the corresponding button.
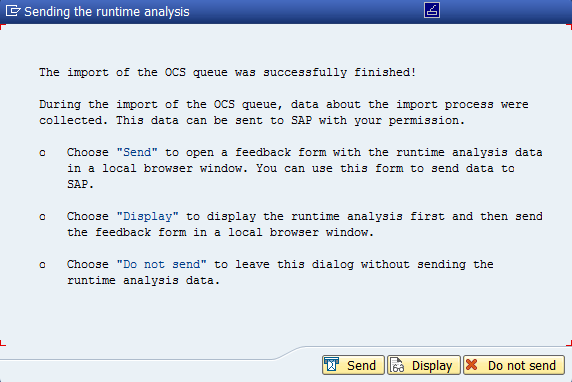
Figure: Sending the runtime analysis
The installation of the AUDIC support packages is complete.